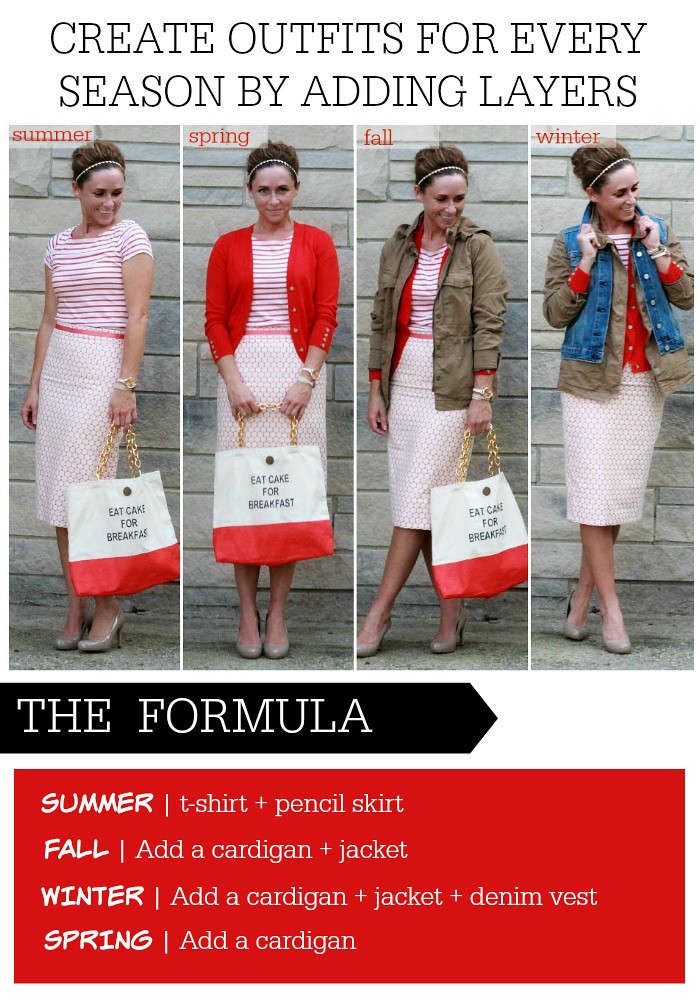
I hate strongly dislike being cold. I also hate strongly dislike limiting my brightly colored pieces to being worn only in the summer. Putting these two together is what drives me to create outfits for each season by adding layers to my summer pieces. It's a pretty formulaic way for me to use my clothes more effectively while keeping my look fresh. If you read my post on overcoming 12 months of insecurity, you saw the spring version of this outfit and since then, I've been able to rework the same pink and orange pieces to use even as the weather turned chilly. I've found that extra layers of denim and khaki always add interest and texture. Next year, I could go with a different colored cardigan and work through the whole formula again to create an entirely new group of outfits. Cool, yeah?
I'm not a big Valentine's Day celebrator--I don't decorate my house for it, bake little heart cookies for my children's lunch boxes or even send out cards. Total party pooper, I know...
What I do love about the holiday though, is all the pretties that start to pop up in stores. Here are just a few of my current V-day faves.
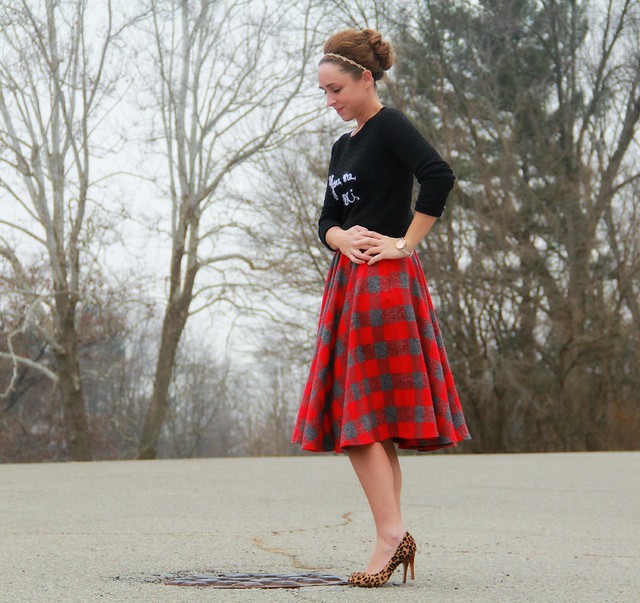
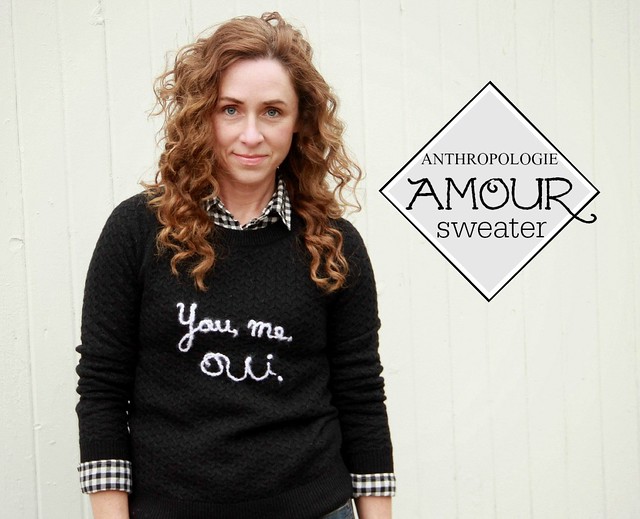
Wahoo! I'm finally getting around to posting my favorite piece from the Winterstruck Collection. Small confession. I have absolutely zero problems starting and finishing projects. What I really struggle with is actually getting said projects onto the blog. I'm pleased as punch I persevered for this one. In case you missed it, you can see the tutorial for my Anthro look-alike Amour sweater right here.
I love cozy wool. Like love, love, love it, so I used a drapey wool for this design rather than the slub-satin plaid fabric I'd originally found. It was not awesome... The result was a rather fabulous, weighty version of the Winter Festival midi circle skirt. I've generally kept to fitted shapes when using heavy fabric and tried a pencil skirt design first. It was just too normal and expected. Blech. This is so much better, yeah?
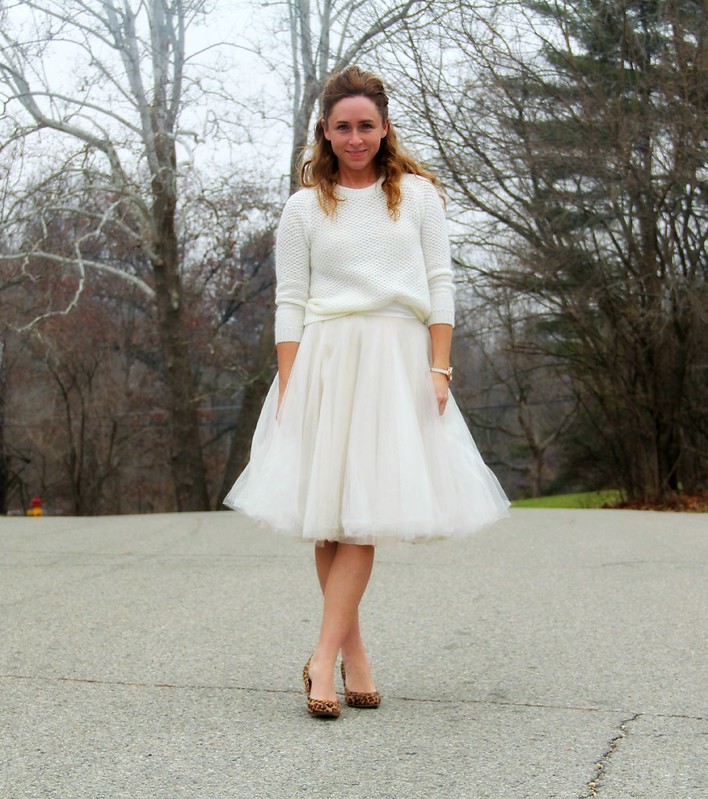
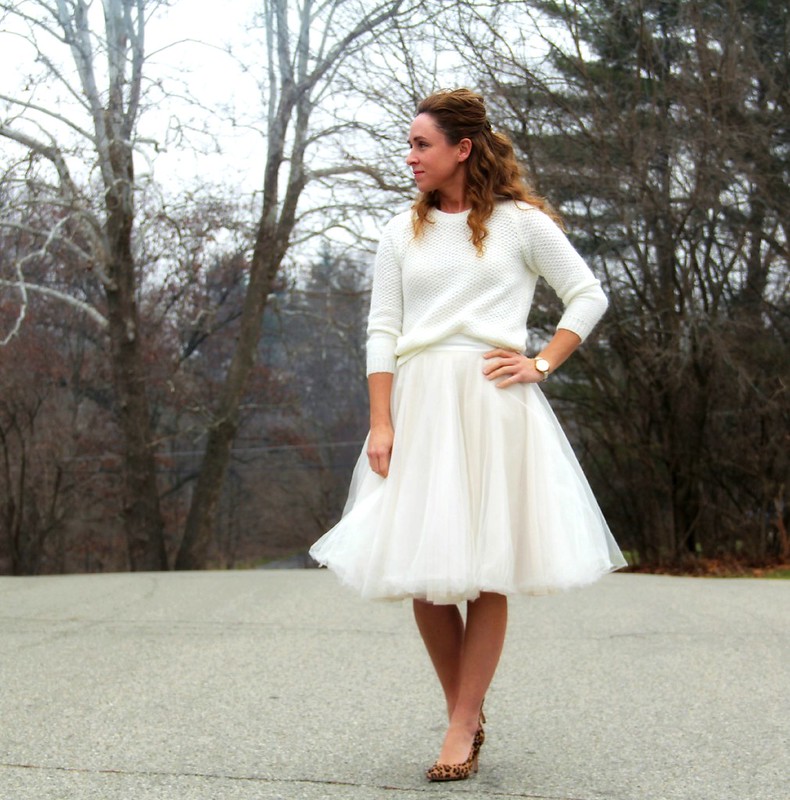
I know you guys love a great tulle skirt and I guarantee you this design from last year has never disappointed. The thing about cream tulle is that it can sorta look blah, so I thought if cream is too dull for winter, what might cream on cream look like? Shockingly, a whole lot of one color felt surprisingly less dull. Win, win.
It's a two-edged sword--this impulse to recreate a version of something you see in a store. On the one hand, I'm always thinking, do I really want to spend the time it will take to make this rather than buying it? and on the other hand I'm all like, no way will I spend THAT much money when I can just do it myself! Hear me?Of course, when the price point is set at hundreds of dollars, it makes the decision a lot easier.
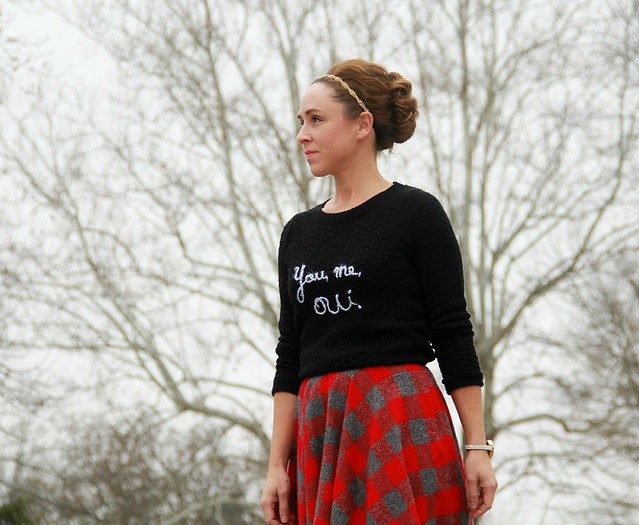
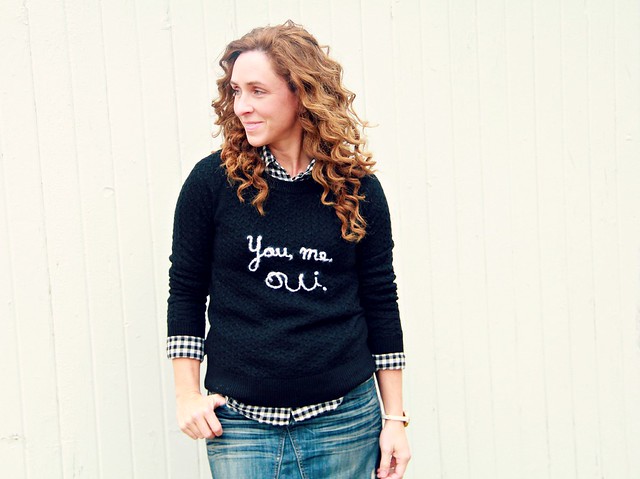
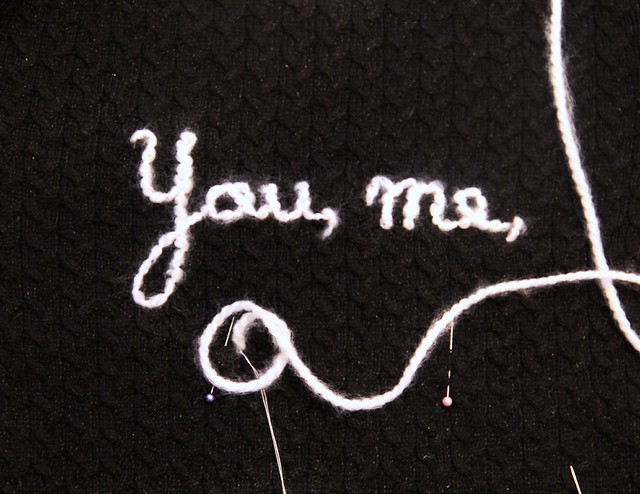
After spotting the gorgeous image of the Amour pullover on Anthropologie's IG account during the holidays, I was determined to have one for Valentine's this year. With a discount sweater and a bit of yarn I set out to create this diy version of Anthropologie's Amour Pullover. If I had to do it over, I'd probably try to spread my letters some more, but it's hard to gauge when you're in the middle of tacking the yarn to the top.
This technique allows you to have curving lines as opposed to block letters.
1. With the sweater on, mark where you want the words to begin and end with pins.
2. Form a knot in the thread and weave it through the tail of your yarn several times.
3. Pull the yarn through from the inside to the outside, leaving extra yarn on the inside to form a knot that won't pull through the top to the outside.
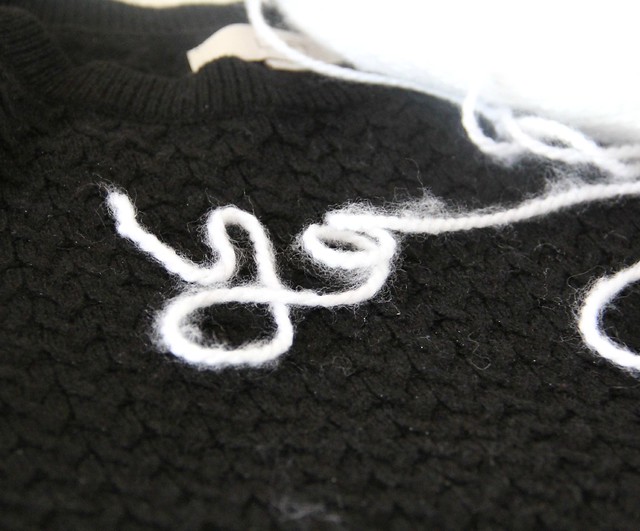
4. The technique you'll use to tack down the yarn is to come up on one side of the yarn and go down the other side into the same hole where you brought the thread up. This is an embroidery technique called couching. You can see a great illustration and example of couching on this DMC Threads blog post. This technique allows you to have curving lines as opposed to block letters.
5. Lay the yarn out in the general shape of your lettering and begin couching every 1/4 inch or so. You'll need to tack the yarn closer together around small curves for it to stay in place.
6. Continue with all the words until complete. If you run out of thread, start again with step 1.
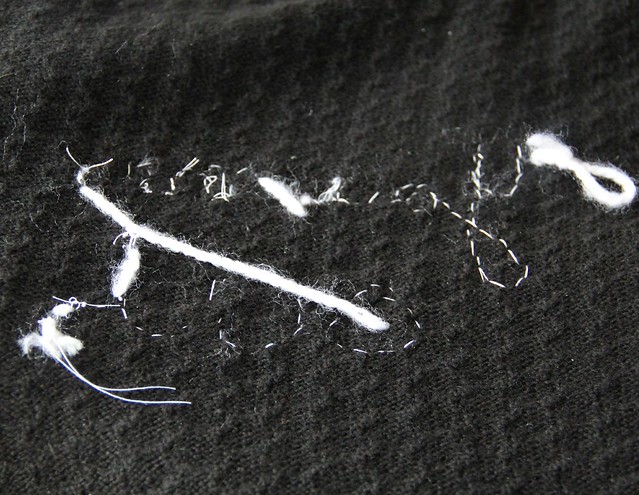
7. When you've completed the text, pull the thread to the inside and cut, leaving a good sized tail. Tie a large knot that won't pull through. The inside of your sweater will look something like this.
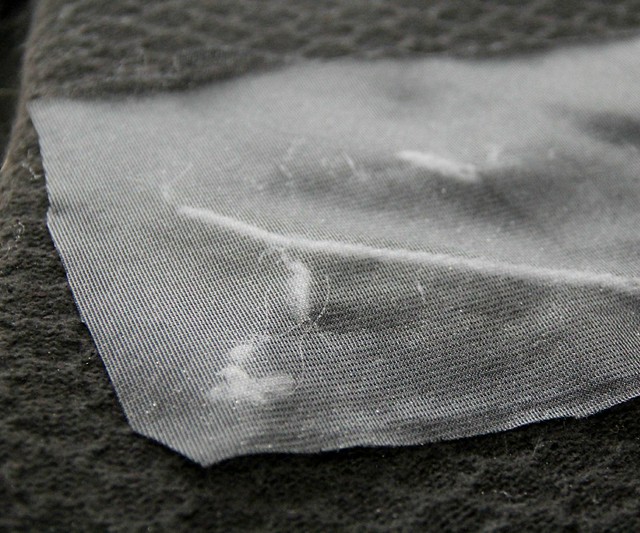
8. Place Pellon over threads and yarn and lightly iron until fused. This will help unraveling when washing.
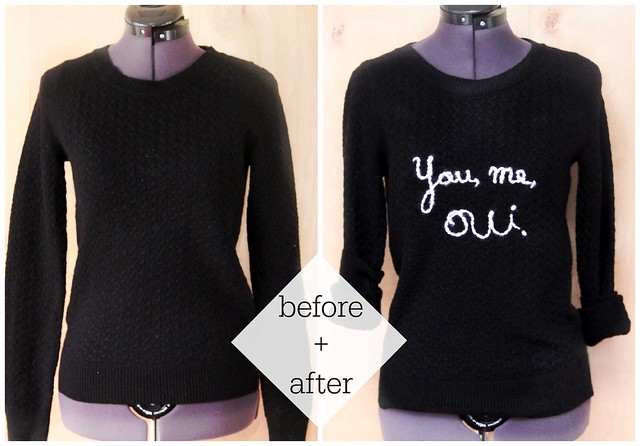
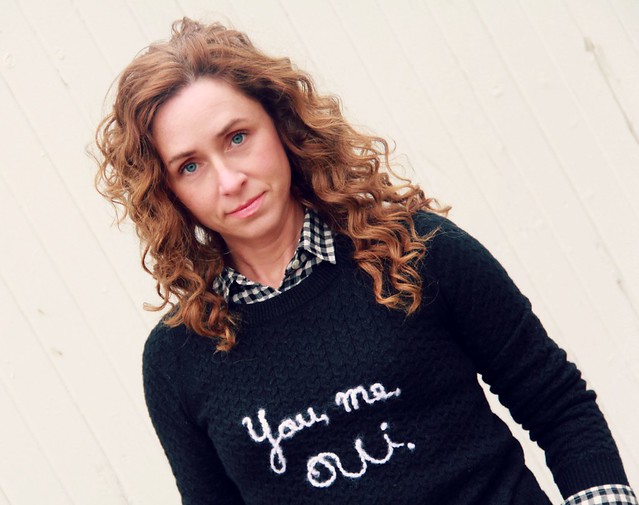
9. DONE. For $20 and 30 minutes, I have an AMOUR sweater that I, well...amour! Bam.
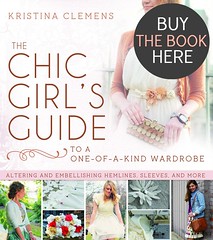
Hello, mah dears! SEVERAL months ago, I contacted Caroline, author of the Sew Caroline blog to see if she wanted to feature a fashion project using a tutorial idea from my book, The Chic Girl's Guide to a One-of-a-Kind Wardrobe. Caroline features sewing tutorials and pattern design and I thought she'd be the perfect fit to demonstrate how to take a sewing tutorial idea and revamp it to fit her personal style and ideas. She chose the Sleeve Addition tutorial on page 73. You can see the full post on her blog, Sew Caroline.
I didn't have a sleeveless top in mind to transform, so I took some of my black faux leather fabric I snagged at Girl Charlee and make another April Rhodes Riding Peplum + added sleeves to this! I'll be honest, I love the IDEA behind my project (Lace + Leather) but the darts didn't turn out as wonderfully as I had hoped (and I am sure it is because the weight/hand of the fabric I used). I think before I wear it out in the eye of the public I'll make some adjustments. See this post to look at how the darts are supposed to lay.
For the sleeves, I used the outer layer of an old lace tunic from Target I had in my closet that had grown a wee bit too small (oops ;)). I grabbed a sleeve block from another pattern I had lying around my studio and went to town.
The back of this top features a fun exposed zipper. I've been loving exposed zips lately (ahem...) and want to try to incorporate one into a Sew Caroline pattern in the future!
SO! There ya go, my Kristina J-inspired Riding Peplum!
Be sure to grab a copy of Kristina's book HERE* if you want to be inspired by her lovely creations as well!
*affiliate link